A dead keypad battery usually shows up at the worst possible time - when you need fast access and the keypad suddenly stops responding, beeps weakly, or flashes and does nothing. That is exactly why a gun safe keypad battery replacement guide matters. Replacing the battery is usually simple, but doing it the right way helps you avoid lockouts, false alarms, and unnecessary wear on the lock.
Most electronic gun safe locks are dependable, but they are still powered devices. If the battery gets weak, the lock may accept your code one moment and fail the next. That can be frustrating on a bedside handgun safe, but it can be a bigger issue on a full-size gun safe storing multiple firearms, documents, and other valuables. A little battery maintenance goes a long way toward keeping access dependable and secure.
When a gun safe keypad battery replacement is needed
In many safes, the first warning is inconsistent behavior. The keypad may light up dimly, beep more softly than usual, or require a second code entry before the lock opens. Some electronic locks give a specific low-battery signal, such as repeated chirps, a flashing red light, or a delayed unlock.
Not every odd keypad issue points to the battery, though. If the keypad has fresh batteries and still acts erratically, the problem could be a loose keypad connection, a damaged battery contact, humidity-related corrosion, or a failing lock body. That is why it helps to start with the battery first. It is the easiest fix, and in many cases, it solves the problem immediately.
As a general rule, replace keypad batteries at least once a year, even if the lock still works. For quick-access handgun safes used daily, changing them every six to nine months can be the safer move. Usage patterns matter. A keypad that gets used several times a day will drain power faster than one on a long gun safe opened only occasionally.
Before you replace the battery
Start with the safe door open if at all possible. This is the single best way to avoid problems during a battery change. If the battery dies completely or the keypad resets unexpectedly, you do not want to be troubleshooting with the door locked.
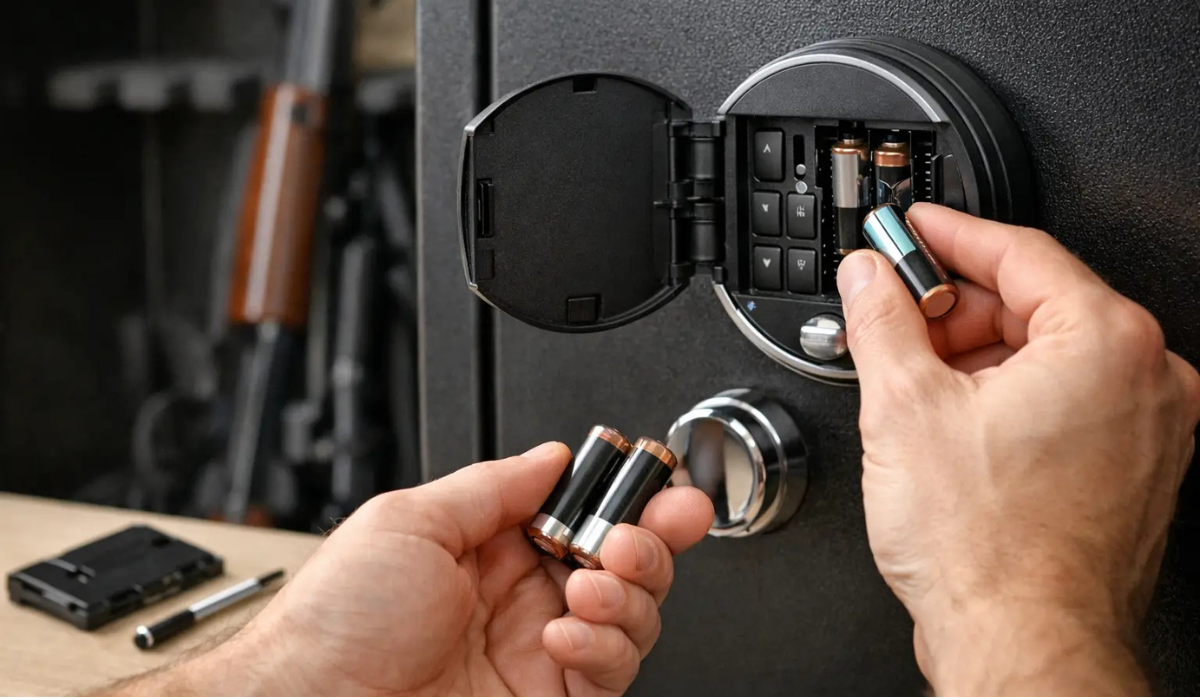
Next, confirm what battery type your lock uses. Many gun safe keypads use a 9-volt battery, while others use AA or AAA batteries inside the keypad housing or behind the door panel. Check your owners manual if you have it, or inspect the keypad carefully before forcing anything open. Some battery compartments slide out from the bottom or side of the keypad. Others require removing the keypad faceplate or accessing the battery tray from the inside of the door.
Use a fresh, name-brand alkaline battery unless your manufacturer specifies something different. Cheap batteries can have inconsistent output, and rechargeable batteries sometimes deliver lower voltage than the lock expects. That does not mean rechargeables never work, but it does mean they are not always the safest choice for critical access equipment.
How to replace the battery safely
The exact steps vary by lock brand, but the process is usually straightforward.
1. Keep the safe open during the change
With the door open, extend and retract the bolts once before you begin so you know the lock is functioning normally. Then leave the door open while you replace the battery. If something goes wrong, you can still work on the lock without risking a lockout.
2. Locate the battery compartment
Look for a sliding tray, pull-out drawer, or removable keypad cover. On many electronic gun safes, the battery sits directly behind the keypad. On others, especially some larger fire-rated safes, the battery pack may be mounted on the inside of the door panel.
If the keypad cover does not move easily, do not pry aggressively with a screwdriver. Plastic keypad housings can crack, and damage there can affect both appearance and function. A gentle push, slide, or lift is usually all that is required.
3. Remove the old battery and inspect the contacts
Once the old battery is out, take a quick look at the terminals. If you see white or green residue, that suggests corrosion. Light corrosion can sometimes be cleaned carefully, but heavy buildup may mean the keypad or battery connector needs service.
Also check whether the battery was loose in the compartment. A battery that shifts during normal use can cause intermittent power loss, which sometimes feels like a keypad glitch rather than a battery issue.
4. Install the new battery in the correct orientation
Match the positive and negative terminals exactly as marked. For a 9-volt battery, make sure the snap connector is firmly seated. For AA or AAA trays, double-check polarity before closing the compartment. A battery installed backward will not power the lock and can waste time when you are trying to figure out why the keypad is still dead.
5. Test the keypad before closing everything up
Enter your code with the safe door still open. Listen for normal tones and confirm the lock retracts as expected. If your lock has an indicator light, check that it looks stronger and more consistent than before.
Run this test two or three times. That extra minute is worth it. If the keypad works with the door open every time, you can close the compartment and resume normal use with more confidence.
If the keypad still does not work after battery replacement
This is where a basic battery swap turns into troubleshooting. If you have installed a fresh battery and the keypad is still unresponsive, there are a few likely explanations.
First, make sure the battery itself is good. It sounds obvious, but even new batteries can occasionally be weak or defective. Trying a second fresh battery is a smart next step.
Second, check for contact issues. Bent terminals, dirty connectors, or a compartment door that does not fully seat can interrupt power. Third, consider the environment. Safes in garages, workshops, or humid spaces may be more prone to corrosion and electronic issues over time.
There is also the possibility of a lock problem rather than a power problem. Some electronic lock systems have wiring that runs from the keypad to the lock body inside the door. If that connection is damaged or loosened, the keypad may appear dead even with a fresh battery. In that case, it is best not to keep forcing the keypad or repeatedly slamming the door. You could make a minor issue worse.
If your safe includes an override key, use it only as directed by the manufacturer. If it has an external battery contact point, follow the manual carefully. Those features can be helpful, but they are model-specific, and guessing is not a good strategy with a security product.
Battery habits that help prevent lockouts
The best gun safe keypad battery replacement guide is not just about changing batteries. It is also about avoiding the stressful moment when the keypad fails unexpectedly.
A simple routine works well for most owners. Replace the battery on a set schedule, keep a spare battery nearby, and test the lock periodically with the door open. If your safe protects firearms for home defense, battery maintenance should be treated the same way you treat other readiness checks. Reliable access matters.
It also helps to pay attention to changes in keypad behavior. A delay after entering the code, weaker sounds, dim lights, or occasional failed entries can all be early warnings. Do not wait for a complete failure if the lock is already telling you power is getting low.
Store your backup key, override key, or emergency access instructions in a separate secure place, not inside the safe and not taped to the back of it. That sounds basic, but it is a common mistake.
A few model-specific differences to expect
Not all gun safes handle battery replacement the same way. A compact biometric handgun safe may have a small internal battery tray that takes four AA batteries, while a larger electronic lock on a full-size gun safe may use a single 9-volt battery mounted behind the keypad. Some premium locks have clearer low-battery warnings than entry-level models.
That is why owner familiarity matters almost as much as the battery itself. If you just bought a safe, take five minutes to learn where the battery goes and how the lock signals low power before you actually need to deal with it. For many buyers, especially first-time safe owners, that small bit of preparation prevents a lot of frustration later.
If you are shopping for a new safe and comparing lock types, battery access is one of those practical details worth checking. Fire ratings, steel thickness, boltwork, and anchoring features still matter most, but ease of lock maintenance should not be ignored. A safe should be secure, but it should also be practical to live with.
At Secure Zoned, we see this a lot with buyers choosing between different electronic and biometric options. The lock is not just a feature on a spec sheet. It is the part you rely on every time you need access.
A fresh battery is a small thing, but with a gun safe, small things often decide whether access is dependable when it counts.