A wall safe usually looks simple until the tape measure comes out. That is where many installs go sideways. A safe that looks right on paper can still run into a stud bay that is too shallow, trim that will not sit flush, or a door that opens straight into a shelf, vanity, or closet jamb. If you are figuring out how to measure for a wall safe, the goal is not just finding a cavity that seems close. It is making sure the safe fits the wall, fits the room, and still works the way you need it to once it is installed.
Start with the wall, not the safe
Most in-wall safes are designed to fit between standard wall studs, which in many US homes are spaced 16 inches on center. That usually leaves about 14 1/2 inches of open space between the studs. Usually matters here because older homes, custom framing, remodels, and utility lines can change what is actually available.
Before you look at product dimensions, find the stud bay you may want to use. A stud finder helps, but it is smart to verify with a small inspection hole in a hidden spot if you are serious about installing there. Measure the clear width between the studs, not the on-center spacing. That clear opening is what determines whether the safe body can physically slide into the wall.
Then measure the wall depth. A standard interior wall framed with 2x4 studs and finished with drywall often gives you roughly 3 1/2 inches of stud depth. Some wall safes are built for that common depth, but not all. Exterior walls, older plaster walls, and walls with tile or paneling can change the usable depth. If the safe body is deeper than the stud cavity, it will not sit properly, no matter how well the width looks.
How to measure for a wall safe: the three dimensions that matter
When people ask how to measure for a wall safe, they usually focus on height and width. Those matter, but there are really three dimensions you need to compare carefully: rough opening width, usable height, and wall depth.
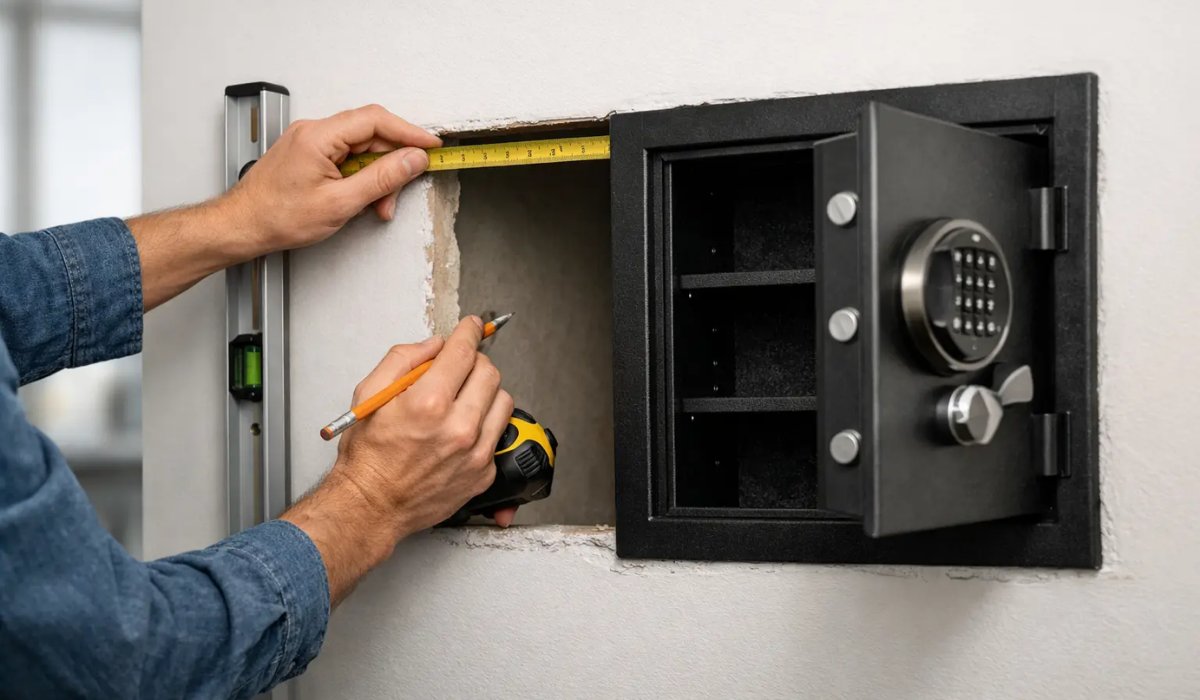
Width between studs
Measure the narrowest point between the studs in the cavity. Do not assume the spacing is perfectly consistent from top to bottom. Wood can bow. Drywall can bulge. Framing can be slightly out of square. If the safe body width is close to your measurement, leave yourself some margin. A safe that is technically 14 1/4 inches wide may not go easily into a cavity that measures 14 1/2 inches at one point and slightly less elsewhere.
Height available in the stud bay
Wall safes vary a lot in height. Some are compact enough to fit above a shelf or inside a closet wall. Others are much taller and require a more deliberate location. Measure the vertical space where the safe will sit, but also check for horizontal framing members like fire blocks or bracing inside the wall. A stud bay may look open from the outside and still be interrupted halfway up.
If you are placing the safe at a convenient reach height, think about how you will actually use it. A safe installed too low can be awkward for documents and jewelry. One installed too high may be less practical for quick access or daily use.
Depth of the wall cavity
This is where many buyers get tripped up. The listed external depth of the safe body is the number to compare to the stud cavity, not the door thickness or trim dimensions. If the wall has plumbing, electrical wiring, ductwork, or insulation you need to preserve, your usable depth may be less than the framing depth.
That matters even more on shared bathroom walls, kitchen walls, and exterior walls. A perfectly sized wall safe can still be a poor fit if the location hides pipes or wiring. If the wall is not clearly empty, inspect before you commit.
Pay attention to flange and trim dimensions
Many wall safes have a front flange or trim that overlaps the drywall opening. That trim is helpful because it covers the cut edges for a clean finished look. It is also why you should not confuse body dimensions with overall face dimensions.
The body must fit inside the wall cavity. The flange must fit cleanly on the wall surface without hitting nearby trim, shelving, cabinets, or door casings. If you are installing inside a closet or behind a picture, the face dimensions can matter just as much as the recessed body size.
It is a good idea to mark the safe's full front outline on painter's tape before cutting anything. That lets you see whether the trim will interfere with baseboards, closet rods, built-ins, or light switches. It is a small step that can save you from choosing a location that technically works inside the wall but looks cramped once finished.
Door swing and access clearance matter more than you think
A wall safe can fit the opening and still be frustrating to use. The door has to open fully enough for you to remove documents, access shelves, or enter the keypad comfortably. That means measuring the space in front of the safe, not just inside the wall.
If the safe is going in a closet, make sure the closet door, hanging clothes, and shelving do not block the safe door. If it is going behind a framed picture or mirror, check that the cover can move out of the way without limiting access. If the safe uses an electronic lock, leave room to see the keypad and operate it without twisting sideways.
This is also where hinge style matters. Some doors swing wider than others, and interior shelves can be easier or harder to use depending on how much the door opens. If you plan to store legal documents, passports, cash, jewelry boxes, or a handgun safe insert, think about the actual removal angle, not just the listed capacity.
Think about what you are protecting
The right measurements depend partly on what will go inside. Documents need less depth than bulky jewelry cases. A passport, small stack of cash, and backup drive can work in a compact safe. Important binders, folders, or larger valuables may need more interior height and usable shelf space.
This is the trade-off with wall safes in general. They are great for concealment and efficient use of space, but they are limited by the wall cavity. If your must-have items are thicker, heavier, or more numerous than a typical in-wall safe can handle, a larger home safe or floor safe may be the better answer.
That does not make a wall safe a bad choice. It just means measuring should start with both the wall and the contents. Security works best when the safe matches the job.
Common measuring mistakes to avoid
One of the most common mistakes is measuring only the visible wall area and ignoring what is inside it. Another is assuming all walls use standard framing. A third is forgetting the safe needs enough room to install, anchor, and open comfortably.
It is also common to rely on nominal lumber sizes. A 2x4 stud is not actually 2 inches by 4 inches, and that difference affects wall depth. Similarly, product photos can make a safe appear slimmer or larger than it really is. The spec sheet is what matters.
If you are comparing multiple models, keep your notes simple. Record the cavity width, height, depth, any obstructions, and the clearance in front of the opening. Then compare those numbers against the safe body's external dimensions and the front trim dimensions. That keeps you from mixing up fit measurements with storage measurements.
When a professional measurement makes sense
Some installations are straightforward. An interior closet wall with clear stud spacing and no utilities is often manageable for a confident DIYer. But if you are dealing with plaster, masonry, tile, uncertain wiring, or a location near plumbing, getting professional help can be worth it.
A wall safe is not just another home accessory. You are cutting into a finished surface and placing a security product that should perform the way it was intended. If the wall conditions are questionable, a little caution now beats patching drywall and starting over later.
For buyers who want more confidence before choosing a model, working with a knowledgeable safe retailer can also help. The right support can quickly narrow down which dimensions are realistic for your wall and which models are likely to create installation headaches.
A simple way to confirm your fit
Before you buy, measure the wall cavity width and depth, inspect for obstructions, and mark the safe's body and face dimensions on the wall. Then check the clearance for door swing and your hand access. If all of that works on the wall, and the interior capacity still fits what you need to protect, you are looking at a much better match than someone shopping by photo alone.
A wall safe should feel intentional once installed - clean in the room, practical to access, and sized for the valuables that matter most. Measure with that end result in mind, and you will make a much smarter choice the first time.